
There was a time in my mid-teens where I much more of a knitter than a sewer, which is surprising considering how central sewing has become to my life. Between the ages of about fourteen and seventeen I made: a satchel knitted in such a way that it looked woven, many snoods for myself and friends (a couple of which I still have), a jumper, baby cardigans for a teacher’s daughter and my cousin, and other small miscellaneous project that have been lost to time. However, I fell out of love with knitting for a number of reasons: it was expensive, it took more time than sewing (and I can be pretty impatient) and I didn’t feel confident in my skill level. I laid down my knitting needles for a good four years before finally picking them up again.
In a strange turn of events, I owe the end of my knitting haitus to Senator Bernie Sanders. Perhaps one of the most memorable aspects from President Joe Biden’s inauguration was a particular photo of Bernie Sanders, sitting with his legs crossed and arms folded, wearing a pair of eye-catching mittens made for him by Jen Ellis, a schoolteacher from Vermont. The photo sparked a frenzy of memes, placing Bernie Sanders in unlikely places, including the Friends sofa and the Iron Throne from Game of Thrones. As my boyfriend is a big fan of both Bernie Sanders and memes, I decided to make a pair for him. They were a great success and he was delighted.


This may seem unrelated, but it was this chain of events that led to me making my Beryl cardigan. I bought my wool for the Bernie mittens from Lovecrafts and later signed up to their mailing list. A couple of weeks later, I got an email from them about their ‘Bridgerton edit’, a collection of patterns which fit with the aesthetic of Netflix’s Bridgerton (a programme which I watched and really enjoyed!). One of the patterns included in this edit was the Beryl cardigan by Debbie Bliss and I instantly fell in love with it. The cable knit and embroidered flowers felt really vintage and the pastel colours are perfect for spring! I was given some birthday money and was able to take advantage of a 25% offer on the website (they have offers really regularly so they’re worth looking out for!) to get my wool!

I made the size to fit a 36-38″ bust so I bought 10 balls of the Debbie bliss cashmerino in Silver as well as a ball each of Wasabi, Lilac and Rose Pink. I ended up with about half a ball of Silver left but I did shorten the cardigan by 2″ so that’s something to keep in mind if you make this yourself. I will also apologise now for the quality of most of these progress photos, the wool was tricky to photograph, especially as I did a lot of this project in the evenings when the light had gone too much for me to sew.

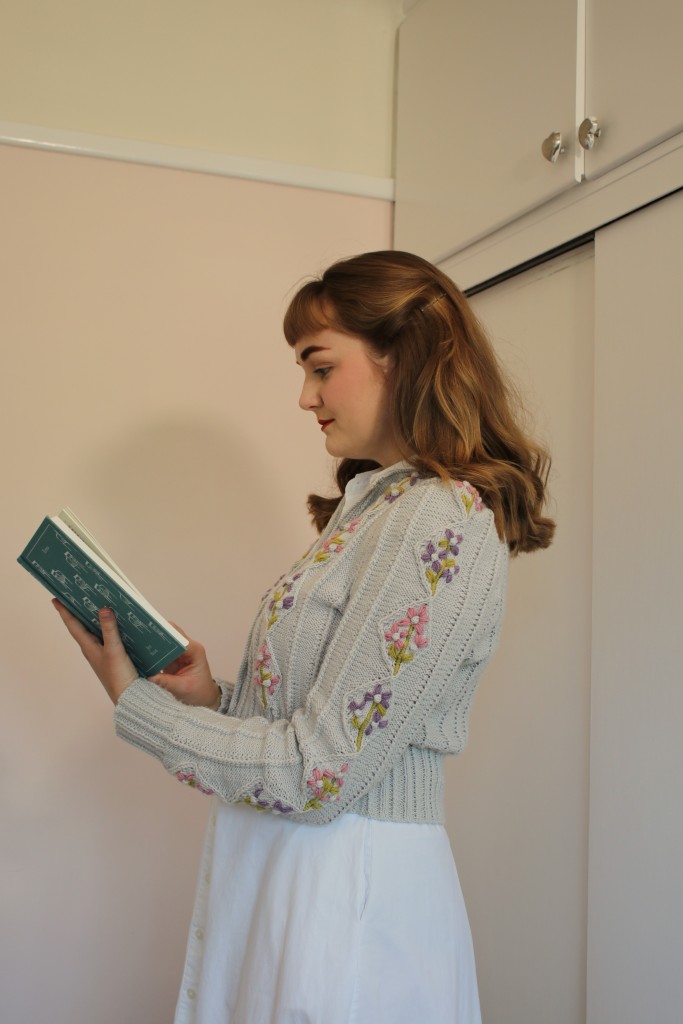
I decided to shorten the rib by 2″ to make the cardigan look more 1940s. I love 1940s cropped cardigans and I think it’s really flattering how they sit at the waist. This style of cardigan is really difficult to find in shops so I figured that if this hack worked then I could use the pattern to make even more! I measured a cropped cardigan I already have to make sure I was taking off the right amount and settled on 2″.
For the first time in my life, I actually made a tension square – well, not a whole square, but a few rows to test out my tension. I really wanted avoid putting all those hours into something that would turn out too small! I’m really glad I did test the tension because my square was about 1/2″ too narrow using 3.25mm needles. I tried again with 3.75mm needles and hit the 4″ width I needed. As I’d increased the size of the needles I was using for the main body, I decided to use 3.25mm needles for the rib instead of 2.75mm needles.

Now that my guage was spot on, I could get started with the actual cardigan. As the pattern instructs, I started with the back. The rib is made up of normal 2×2 rib and twists, at first I was really confused by the twists but I looked up the stitch and it was really simple. For a tw2r, you knit into the front of the second stitch then the back of the first stitch, and for a tw2l, for knit into the back of the second stitch then the front of the first stitch. Turns out I actually read the instructions wrong and all my twist chains are made up of left twists instead or right but this really doesn’t matter! I carried on knitting until the rib measured 4″ in length (instead of the 6″ the pattern instructs) which took me to 35 rows.

With the rib complete, I switched to my 3.75mm needles and carried on with the body. The pattern on the back is really simple, just carrying on the twists and garter stitching in between. I knitted 53 rows which took me to the required 10.5″ length (the pattern instructs 12.5″ but mine is 2″ shorter). Then I could start on the armhole shaping.
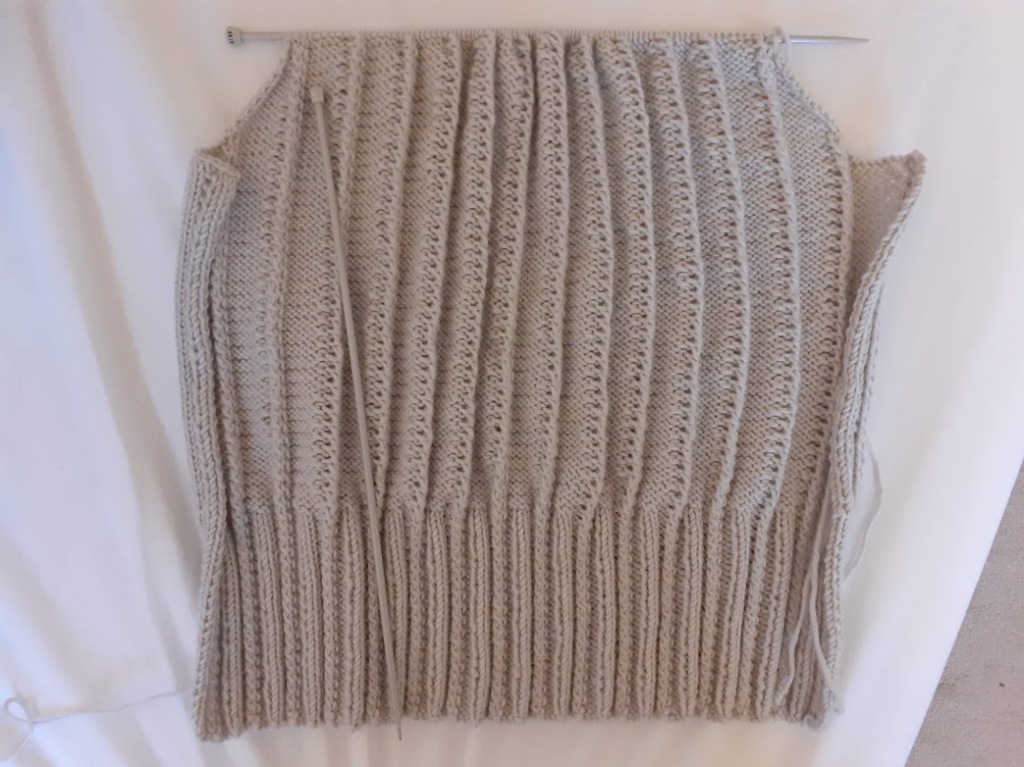
Once I started shaping, the rest of the back came together pretty quickly. I shaped the armhole (which took me to 118 rows from the bottom), shoulders and neckline according to the instructions, leaving stitches around the back neck on a holder to incorporate into the neckband later. Making this piece took me five days which I consider to be pretty reasonable! I was really proud of myself, completing the back piece felt like overcoming a huge hurdle in the project and I was fired up to keep working on it.

With the back piece complete, I started work on the left front. The rib section of this piece went by much more quickly than the back, partly because it’s a much narrower piece but also because I knew I only had to do 53 rows. Being able to count down how many rows were left made me feel like I was progressing much more quickly. When the rib was complete, I could finally start on the diamond motif which covers the front pieces and the sleeves. The pattern is quite simple, like the rib pattern the diamonds are made up of cables stitches which are done without a cable needle. They also have three bobbles which are made by knitting four stitches into one stitch, turning and purling those four stitches then turning again and knitting them together. I initially made the odd mistake in the diamond pattern by not purling the stitches which are outside the diamond as I was used to the two stitch twist cables which made up the rib. Long story short, I got a lot of practice undoing and redoing single stitches in the row.

Once I got used to the diamond motif, it became really fun to knit and, as it was made up of 30 rows, it made the piece feel like it was growing really quickly – considering 3 diamonds instead of 90 rows made me feel far more positive about the amount of work I had to do! I worked 109 rows (or about 3.5 diamonds), not including the rib, before I got to the neck shaping. The neck shaping itself was really straightforward but I ran into the issue of only having one stitch holder. To avoid having to carry the weight of the back piece while knitting the rest of the front, I kept the stitches across the front of the neck on the needle while I worked the shaping instead of putting them on my stitch holder. This worked absolutely fine and I just put the stitches on the stitch holder once I’d cast off. I worked the right front with the shaping of the armhole and neck on the opposite side, using the notes on length that I’d made for the left front, and very soon had two finished fronts!

With the project starting to resemble a cardigan, I got started on the sleeves. I worked the rib, 29 rows to reach a height of 3″, but then I got myself very confused. The pattern sets up a pattern repeat of two rows to be repeated six times, but I misread the pattern and thought the pattern repeat referred to the diamond motif. I had worked about 4 diamonds before I realised my mistake. It was pretty disheatening to have to undo about 120 rows of work but I’ve learned a valuable lesson in reading the pattern properly! What the pattern actually set up was working about 16 rows then an increase row every ten rows. Once I’d increased to the right number of stitches, I only needed one more row to get to the 18″ length the pattern requires.

I had thought the back piece would be the biggest piece of this project, but the sleeves really took it out of me. Each sleeve ended up being 6.5 repeats of the diamond pattern which became quite monotonous after a while. I sat myself down for some marathon knitting sessions to get them done and I was relieved when I’d finished both!

When I finished the sleeves, I laid out all the pieces to admire my handiwork – it may have been in pieces but I had actually knitted a cardigan! I hadn’t knitted anything this big in about eight years so I was really proud of myself for making it this far. However, now I had to face another challenge, making up the piece. This was always something I’d struggled with in the past, my seams ending up bulky and uneven, so I was a little bit nervous!

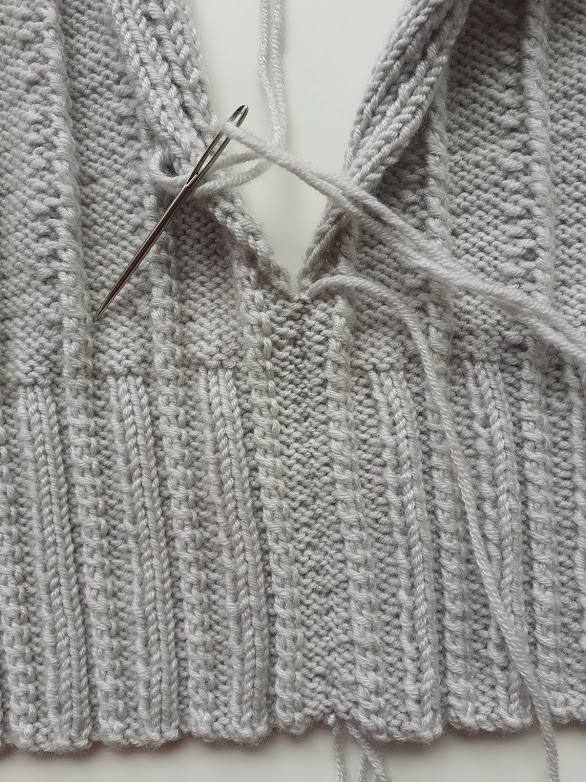
I started with the shoulder seams, as the pattern instructed. As sewing up knitted pieces was something I’d found challenging in the past, my first move was to find some knitting blogs for advice. I found this blog post by Stitch and Story which gave really detailed instructions and advice for horizontal and vertical seams of stocking stitch pieces. Although my pieces were predominantly garter stitch, I was able to get a pretty good idea of how to proceed. Instead of putting the two pieces right sides together and sewing them together like I would do in a sewing project, I laid the two pieces with the right side out, seams parallel. I worked from the front, picking up the small v’s right at the top of the stitch. This method left me with really neat seams.

With the shoulder seams sewn, I could start work on the neckband. This is one part of the project that I was really nervous about because it involved picking up stitches and I needed it to be even. As this was a row I was uncertain about, I made sure not to rush it. I did find that the stitches at the end of the row on the stitch holder (on the side adjoining to the rest of the neck) had become stretched out so I knitted two stitches from the stitch below to close the gap. In the end, picking up the stitches for the neckband was far easier than I thought it would be, I just had to take my time.

Next, I worked on the button band and buttonhole band, something which made me as nervous as the neckbank for exactly the same reason: it had to be even. I got freaked out about the fact that I didn’t know how many rows made up the front and how to distribute the stitches evenly. At first, I tried to pick up the 125 stitches prescribed by the pattern but it was only when I was halfway up the front of the cardigan that I realised that wouldn’t work because I had taken two inches off the bottom of the cardigan. So, I had to figure out how many stitches to do myself. I went back to google and found a really helpful blog post by Ewe Ewe Yarns which recommends that you pick up 3 stitches for ever 4 rows as knit stitches are wider than they are tall so it stops the button band from sagging. I also knew from the pattern that the number of stitches had to be an odd number. I did write down some maths in my notebook that got me to needing to pick up 119 stitches but, honestly, I can’t make head nor tail of it now. As long as it worked, I’m going to go with it.

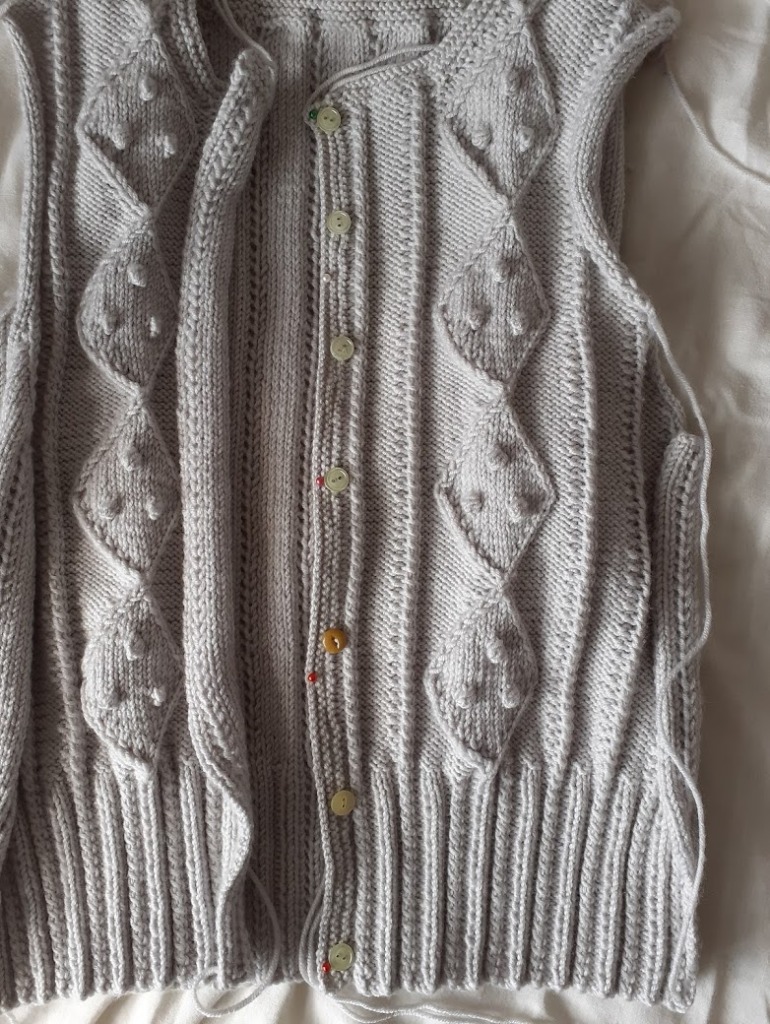
Before I could work on the buttonhole band, I had to decide how many buttons I wanted. The pattern suggests 9 buttons but as I had taken off 2 inches from the length, I though 7 buttons would work better. I also have another cardigan which is about the same length which also has seven buttons. I tried out both using spare buttons I had around and decided that I liked the look of seven buttons better. Then, as I was deviating from the pattern, I had to figure out how to pattern the buttonhole row to make these seven buttonholes. First I had to minus the stitches from the beginning and end of the row, and the stitches that would make up the buttonholes from 119, the number of stitches in the row: this got me to 102. Then, I divided 102 by 6 as this would be the number of gaps between the buttons: that got me to 17. So, every buttonhole would have 17 stitches between them. With that figured out, I could get to work!

Now I could get back to sewing up the cardigan, something I was really enjoying now I had a foolproof method! Using a loose mattress stitch to pick up stitches along the side seams then watching them all disappear when I pulled it tight was actually really mesmerising! I really took my time with these seams as I wanted them to be really neat and it really paid off, the seams are almost invisible!
Once I’d sewn up the side seams and sleeve seams, I set in the sleeves. This was a little fiddly, as I had to make two different sets of curves sit evenly. To make this process a little easier, I used pins to match the top of the sleeve head to the shoulder seam and ease the fullness of the sleeve into the sleeve head. This kept everything in place as I sewed.

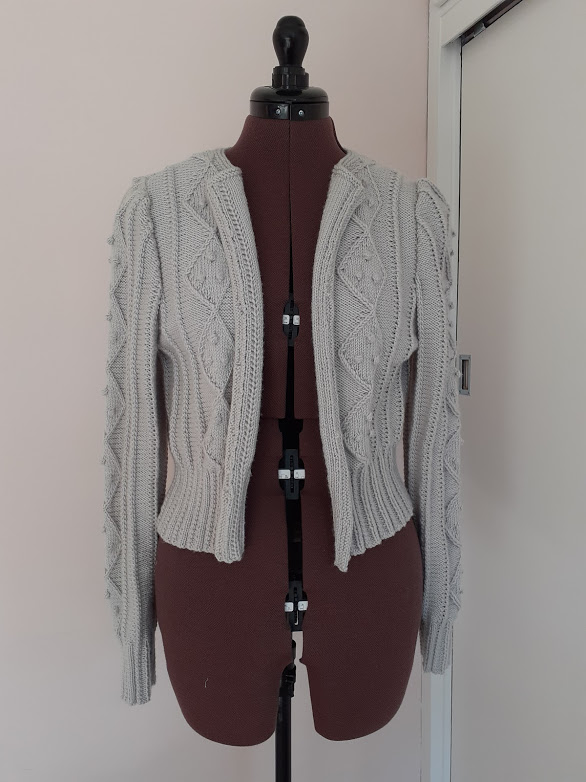
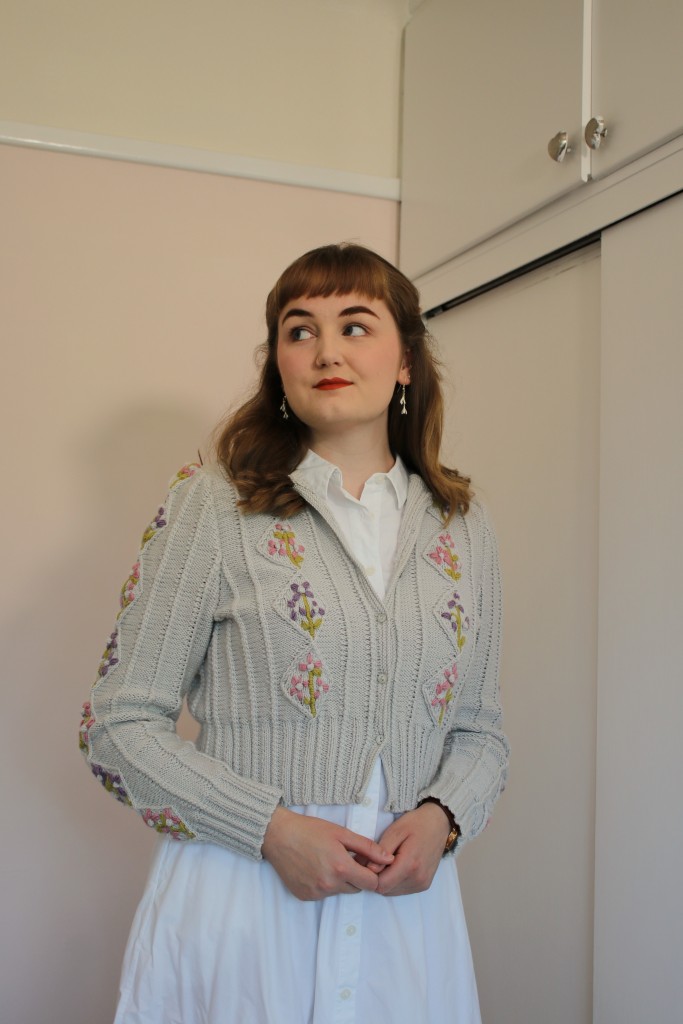
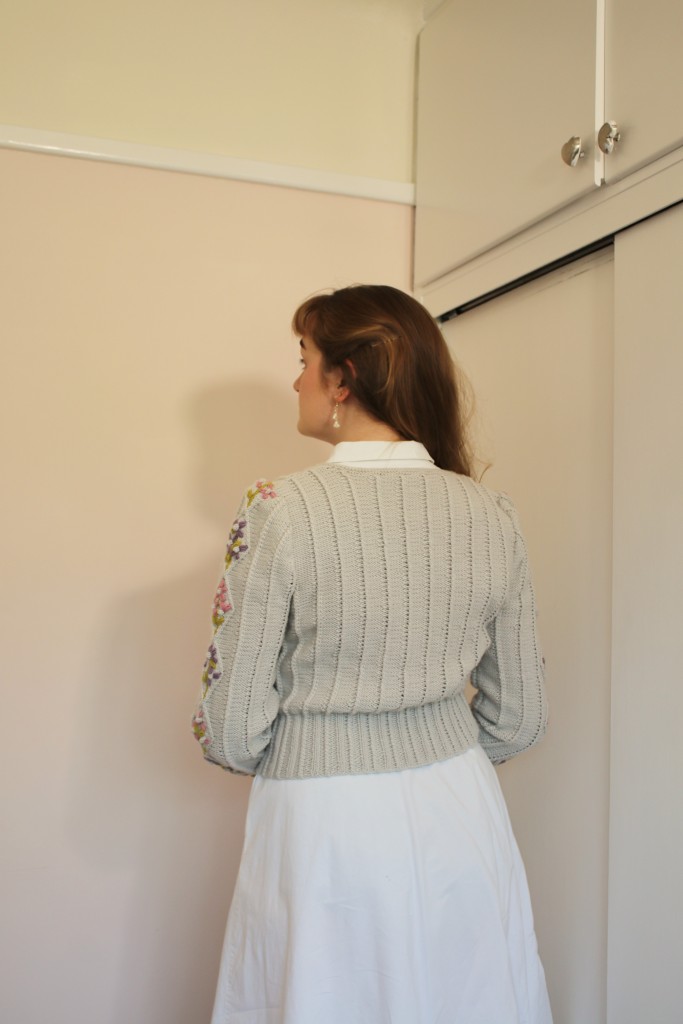
With that, the main body of the cardigan was done! I tried it on and I was so pleased with how it looked, it has a really authentic 1940s silhouette.
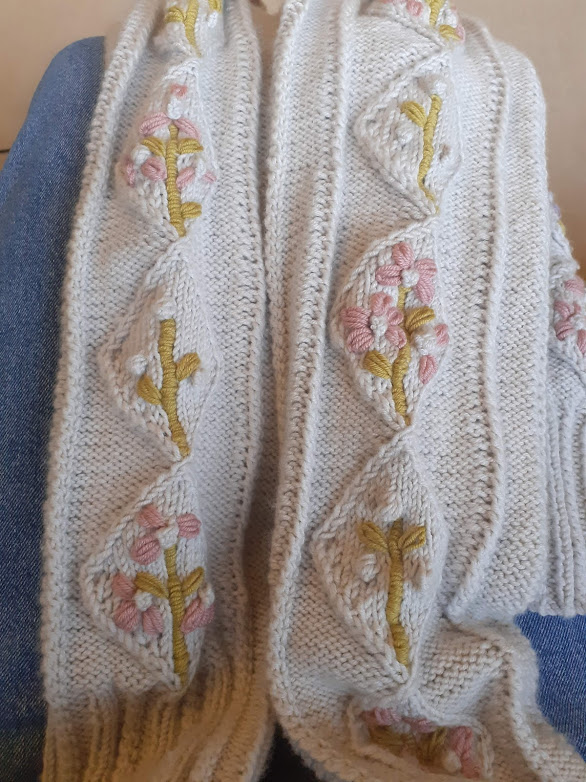
However, the cardigan was not yet complete: I had 21 floral motifs to embroider. When the wool arrived, I was a bit concerned that the yarns for the flowers would be too bright, particularly the Wasabi yarn. However, when I started embroidering with them, they turned out to be the perfect pop of colour needed to lift the cardigan! I used the motifs on the pattern on my cardigan but also made up my own so that they were all slightly different. When I started each embroidery, I tied a knot in the end of the yarn, made a stitch, then thread the yarn through itself just in front of the knot to secure it. Then once I’d finished, I weaved the ends through the back of the embroidered stitches.

When I first started the embroidery on the cardigan, I worked each motif separately. I don’t know whether it was having to switch colours all the time, or the mental effort of having to decide which design to use for each motif, but this method was mentally draining and it took forever. By the time I got to the sleeves, I decided to work all the green stems, then all the pink flowers, and finally all the purple flowers. This method went far more quickly! I will also admit that, in hindsight, it would have been far easier to do the sleeve embroidery whilst the sleeve was still flat. Having to work up the narrow tube of the sleeve was quite tough at times. I followed the pattern by doing it this way but if I did it again I would do all the embroidery before making up.


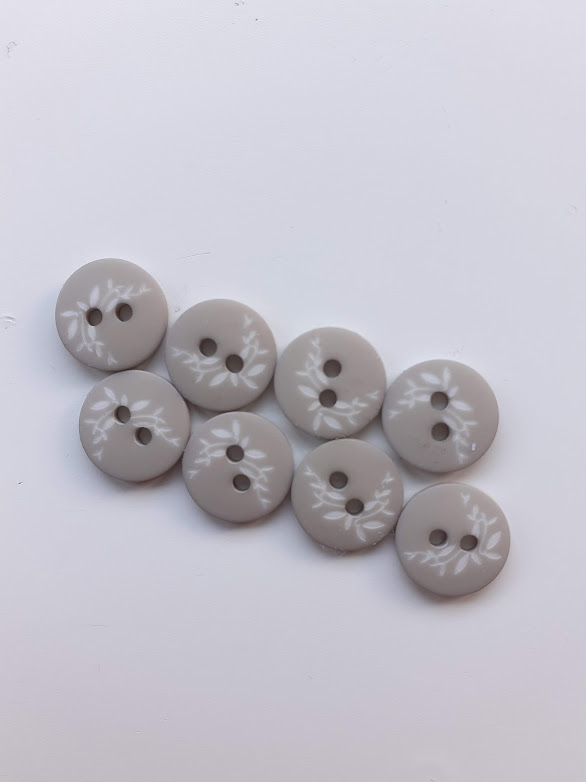
With all the embroidery complete, the end was in sight: all I had to do was sew on the buttons. I waited until I’d sewn up the cardigan before I went to buy buttons so that I could see what the buttons would look like on the finished piece. I found these adorable buttons from my local Fabricland shop (I’m loving being able to go to physical fabric shops again!). The light grey sprig in the centre of the button perfectly matches the grey of the cardigan and fits in with the floral motifs, they were the perfect find! I separated the wool into single strands which I used to sew on the buttons. Sewing these on by hand took no time at all and soon I had a finished cardigan!

I’m so pleased with this cardigan – it’s the 1940s cardigan of my dreams! The alteration I made to the pattern worked so well and it looks really authentic for 1940s looks. What I love about this pattern is that it very easy to adapt for different looks: You can omit the flower embroidery and do a moss stitch or rib in the diamonds, for example. I already have plans to make this cardigan in other colours, maybe yellow or a rusty red! I’m so proud of myself for undertaking this project and seeing it through, it’s really helped my confidence with knitting and it’s great to know I can add another string to my crafting bow. I’ve already worn this out so much and it’ll be just as perfect for summer evenings as it is for winter months. Look out for more photos on my Instagram @r.fereday.


Well Lovely.. You’ve done it again!Are thre no end to your talents!Another excellent account and magnificent knitted cardigan..You may remember that my Mum was an “avid knitter” always with something on the go.. my memories are that she never sat doing nothing..always a garment being produced from a very fetching Balaclava Aand Jumper in a Red Wool with Gold Flecks for me! [VERY FETCHING SADLY NO PHOTOS! :)) To many Cable knitted Aran Sweaters..We never went cold!BTW My Dad was also a knitter, and his brother John Wright was a master on his knitting machine! Keep up the good work Lovely..So proud of You!Luv & Hugs xx
Sent from Yahoo Mail on Android
LikeLike
I do remember!! I have often thought that I have covered all the bases in terms of your mum’s and aunts’ crafty skills! Very sad that there are no photos, I’ll have to make my own cable knit jumpers soon! I love that your Dad and uncle were knitters too – there must be something in the family! xx
LikeLike
Thank you for this – I have seen and admired this pattern for a while but was too daunted to try. Reading of your experience has given me the encouragement needed and as the wool was on sale I have taken the plunge and ordered.
Thanks as well for the tip around knitting a swatch … and the photo ! Like you I often neglect that but this is a fitted garment so this time a swatch will be done!
Well done on your competed garment – it is lovely.
LikeLike
You’re so welcome, I’m glad I could be a help! Thank you so much and good luck with yours!
LikeLike
Haven’t knitted in a long while and I flew through back very straight forward but now I’m struggling to understand diamond section, I can’t see anything referencing them in the pattern at all and pattern is a bit confusing here any help appreciated.
You did a fantastic job
LikeLike
Hi Sarita! Thank you so much! I’ve looked back over the pattern and there’s a section titled ‘pattern panel’ on the third page – it’s below the measurements diagram. This is the pattern panel referred to in the instructions for the front pieces and the sleeves! Hope this helps
LikeLike